How To Brew Artisanal Coffee At Home - What You Need To Be Doing It Right
Tank of Coffee often writes about visits to local coffee shops on a motorcycle. These craft stores are experts at creating a great cup of artisanal coffee and moto coffee is a beautiful pairing. But sometimes you want to make a good cup of coffee at home. Whether it is because of the weather keeping you off your bike or another reason, how do you get your coffee fix when you are at home? Homebrewing is the answer. While you won’t become a barista overnight, you can make a decent cup of joe at home. Many of these approaches also work when you are motocamping, so your summer months may benefit from learning how to homebrew.
We’ll share some brewers that can be used at home in various price points and techniques. We’ll also share some recipes we use at home with several of these brewers. Check out our related podcast episode: Essential Coffee Brewing Gear for Home Baristas.
We sometimes use affiliate links in our content. This won’t cost you anything extra, but if you purchase something from one of the links, we may earn some money for coffee. As an Amazon Associate, I earn from qualifying purchases.
Low Cost <$100
Most of the low-cost options are manual. As such, the quality of the coffee will depend a lot on your technique, the quality of the beans, and the grind size. But at the price, these are within reach of any coffee enthusiast. Learning how to get the best cup is part of the fun of homebrewing.
Pour-over

Hario V60 ~$15
Purchase at Coffee Bros | Amazon
One of the lowest-cost home brewers is the Hario V60. A plastic dripper can be had for <$15, and 100 filter count is <$10. The dripper has raised sections that aim to improve the flow of water. You can choose to be as detailed with your pour-over technique as you like with this brewer.
An alternative pour-over that is good for camping use as it can collapse is the UST Flexware Coffee Drip. It won’t have the smooth flow of the V60, but it is a bit cheaper at <$10 and can collapse to be more compact for storage. See the brewing instructions below.
Immersion

Hario Switch ~$45
Purchase at Amazon
This is more expensive than a basic plastic V60. It’s usually glass for the dripper and has a switch at the bottom. A kit that includes the dripper and a small pack of filters can be purchased for ~$45. The Switch is a regular Hario V60 pour-over design and an immersion with a switch to allow changing between. This will enable you to pour over like the standard V60 and an immersion approach. The two brewers in one make this a compelling option. See the brewing instructions below.
French press ~$40
Purchase at Amazon
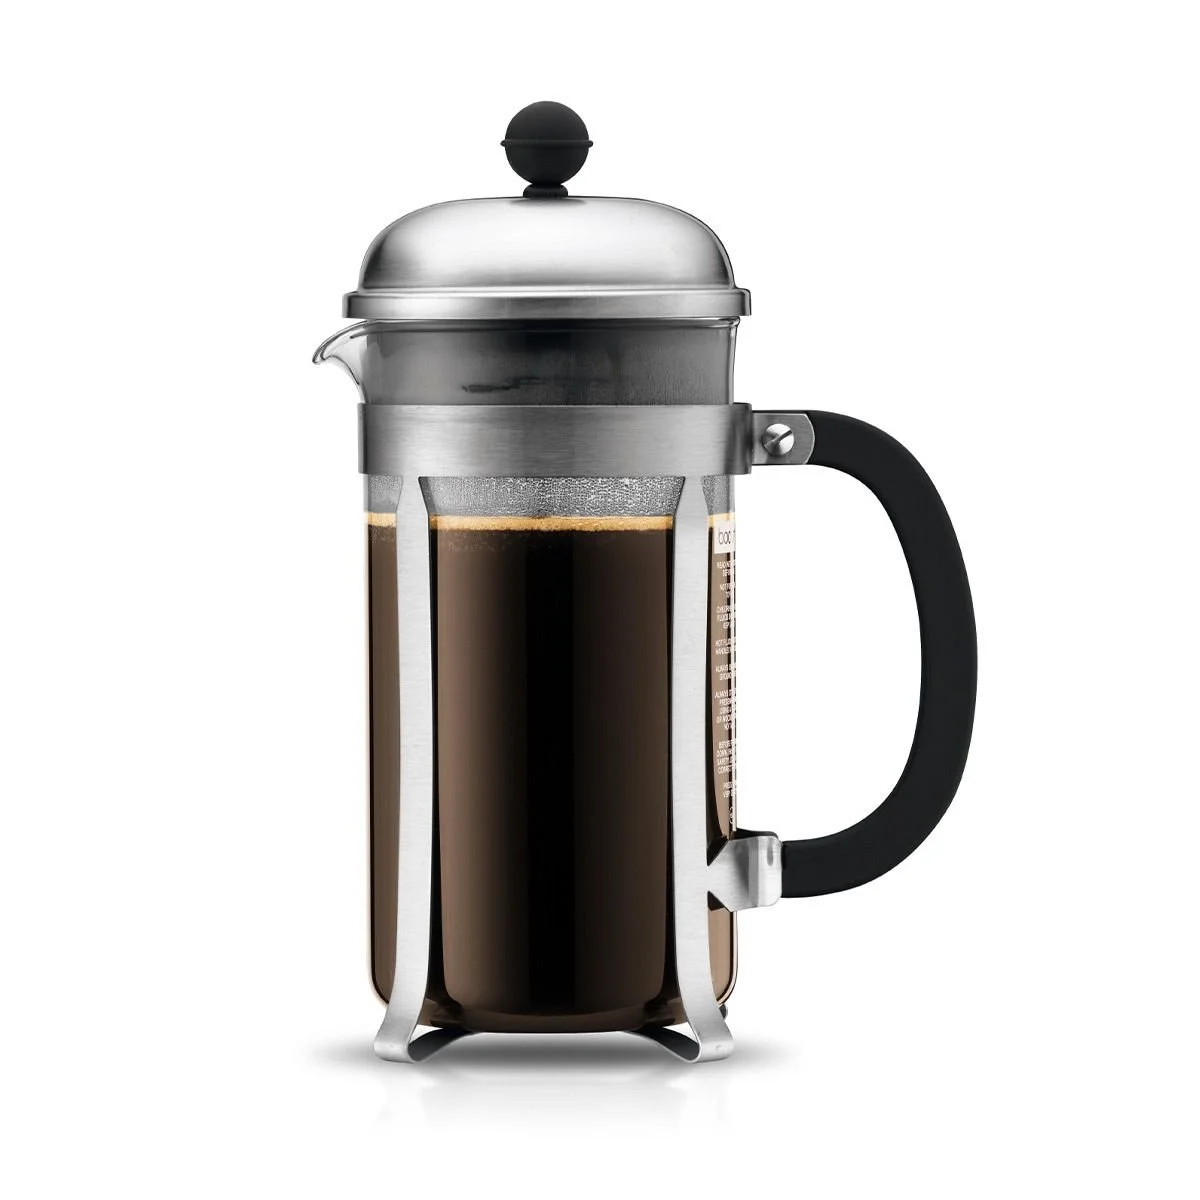
One of the most common homebrewing methods, the French Press, is a simple vessel with a plunger that makes the brewing and serving instrument one. Typically, these are glass vessels with a metal filter acting like a plunger. Grounds are placed in the bottom of the glass, hot water is added, and the filter plunger is added on top. Pushing the plunger down effectively separates the grinds from the rest of the coffee. A pour spout in the glass makes moving the brewed coffee to a cup easy. Available in multiple sizes, these are excellent methods for brewing coffee for a larger group. No paper filters make this a cheap option, too. See the brewing instructions below.

Aeropress ~$40
Purchase at Amazon
The Aeropress has become one of the most popular brewing methods. Many recipes are available to get the most out of it. Essentially, an Aeropress is a plastic vessel with a filter on one end and a plunger that goes on the other side. Pressing down on the plunger creates pressure that forces the coffee through the filter. There are a ton of recipes people have made with it. A basic Aeropress can be purchased for less than $40. The Aeropress is all plastic, and its light weight makes camping easy. Aeropress makes an all-in-one version called the Go, which is slightly smaller than the original but includes a cup, filter holder, and scoop that nest together and sells for <$40. I use that one for camping on the motorcycle. There is also an XL version that is roughly twice the capacity of the original to allow making two cups at once that sell for <$70. See the brewing instructions below.
Oxo Compact Cold Brew Coffee Maker ~$40
Purchase at Amazon
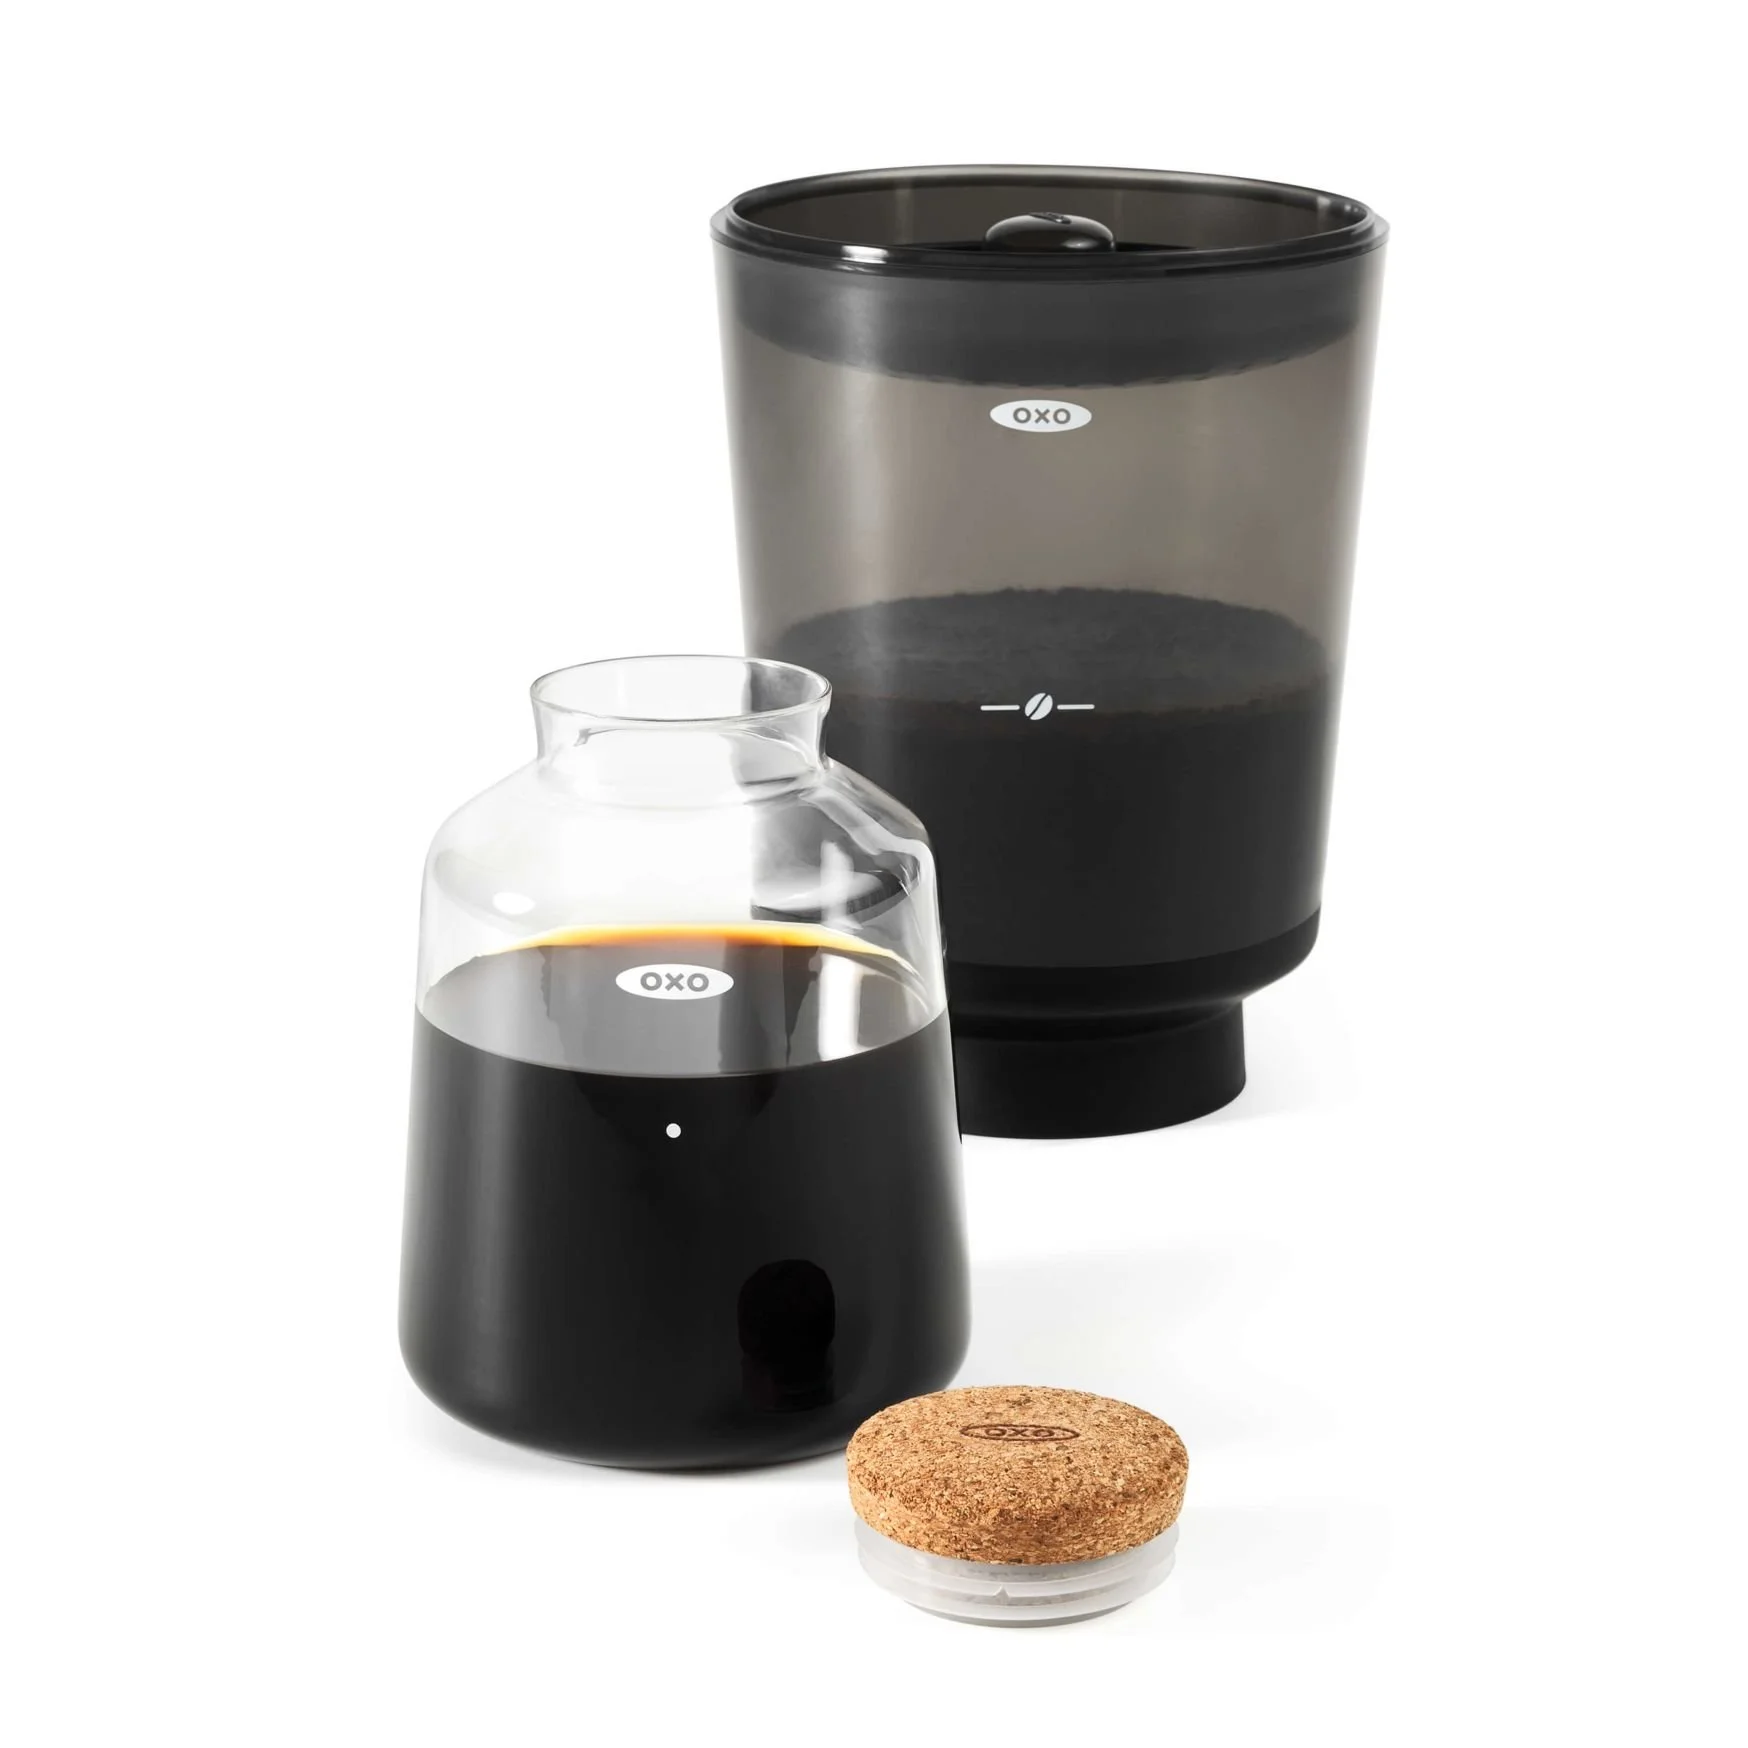
Cold brew coffee has continued to increase in popularity, especially in the summer. The critical attributes of no bitterness or acid flavor lead to a very smooth flavor. This coffee maker from Oxo won’t break the bank at <$40, making it easy to create a cold brew at home. A glass carafe with a cork top can store the maker's concentrated cold brew. The main vessel has a large volume that contains roughly ground coffee and cold water while brewing. A rain spreader for the water ensures an even spread into the grinds. See our full review.
Pressure

MokaPot ~$40
Purchase at Amazon
A common sight in Italian kitchens, the Moka Pot is a pressure-based coffee maker in various sizes and designs. A basic 3-cup (note these are espresso-size cups) is <$40 and usable on gas stoves. They also make ones compatible with similar-sized induction stoves for <$50. These make coffee approaching espresso through a pressure vessel where the water is heated and forced through the coffee grounds up to the top. This is less manual than the other options above. It is not as compact as an Aeropress, so it may not be a good option for camping. See the brewing instructions below.
Mid-range $100-$500
Pour-over

Moccamaster ~$360
Purchase from Coffee Bros | Amazon
An automatic filter coffee maker from the Netherlands. This automated pour-over machine can make multiple cups of coffee per pot. It is straightforward to use, and an excellent quality pot of coffee is produced. This is my preferred option for making a pot of coffee for multiple people. Available in various colors, I love the simplicity of silver in my kitchen. See the brewing instructions below.
Pressure

Piccopresso ~$130
Purchase from Moto Camp Nerd | Amazon
The Piccopresso is one of the most miniature espresso machines available. The small size means no built-in boiler, grinder, or milk frother/steamer. But, if you want to make espresso on the go or at home on a budget, the Piccopresso is an excellent option. See the brewing instructions below.

Breville Bambino Plus Espresso Machine ~$500
Purchase from Coffee Bros | Amazon
One of the cheaper espresso machines on the market, this unit is a good option for beginners and also has a milk frother built in. It comes with pressurized and non-pressurized brew baskets, so it can be used with preground and freshly ground beans, making it an easy choice for a beginner.
Premium >$500
Generally, you look at espresso makers once you get into this price range. Some will include an integrated grinder and/or a frother. All the ones we list here have water tanks, so they don’t require the complex plumbing that professional machines typically have. This makes it easy to use at home and move as needed.

Breville Barista Express ~$750
Purchase at Coffee Bros | Amazon
The Breville Barista is an excellent entry-level espresso machine with an integrated grinder and a frother with a 54mm portafilter.

Breville Barista Express Impress ~$900
Purchase at Coffee Bros | Amazon
This adds some assisted tamping to make producing a good espresso even easier.
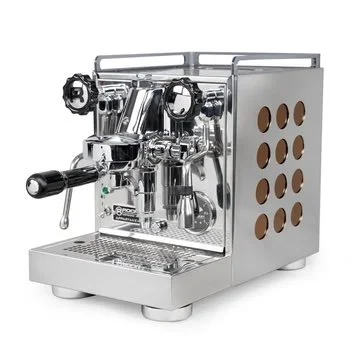
Rocket Espresso Appartamento ~$1850
Purchase at Coffee Bros | Amazon
When you are serious about espresso and want a machine that will last, this mid-tier machine has a 2.25-liter water tank and a 1.8-liter copper boiler that allows brewing and steaming of milk simultaneously.

Rocket Espresso Giotto Type V ~$2350-$2850
Purchase at Coffee Bros
Available with either a vibratory pump or a rotary pump, it features a PID controller to ensure consistent temperature and uses a standard 58mm portofilter.

Rocket Espresso R58 Cinquantotto ~$3300
Purchase at Coffee Bros | Amazon
This features a PID controller for consistent temperature and a color display on the PID controller. It has dual boilers to separate brewing and steaming. The rotary pump supports connecting to a water line.
How to brew at home
So you’ve purchased one or more brewers and now are looking for tips on creating a good cup of coffee using them? We’ve got you covered here.
Pour-over
Pour-over is a common approach for coffee making. Simply put, a cone-shaped filter is filled with coffee grinds, and water is poured over it. The water goes through the grinds, infusing the coffee into the water before draining through a small hole in the supporting funnel. Automated machines like the Moccamaster use these. Hario V60 is a popular one as well and not very expensive. They are often available in both plastic and glass. Similar designs are used for camping coffee with a collapsible funnel to reduce pack size.
Hario V60 / Hario Switch / UST Flexware
Add a V60 filter to the dripper. Heat water to 100 Celsius, wet the filter and pre-heat the dripper with your cup under the dripper. Empty your cup (now warmed by the hot water). Add 18 grams of medium fine ground light to medium roast coffee in the filter. I create a small divot in the grinds. I zero out my scale, ensure I have my water at 100, and then pour it into the middle of the divot to create an even distribution. As the water starts to cover the grinds, I begin a circular motion covering all the grinds, pouring in 60 grams of water. I wait 45 seconds for the bloom and then add 60 grams of water (120 total thus far) in a circular motion to keep all the grinds wet. I wait another 10 seconds and then add another 60 grams. I repeat this 60-gram/10-second pause until I’ve added 300 grams of water. Allow the water to filter through the grinds fully, and it should be about 4 minutes from when you first began pouring. Remove the dripper and filter, and enjoy.
Moccamaster
I use Melita filters with my Moccamaster. My Moccamaster has a 1.25-liter capacity in the tank, which equates to about ten small coffee cups. I aim for about a 16:1 ratio. Depending on the roast, I grind 75 grams of coffee in medium to medium-fine grind. Add water up to the maximum fill line. Add the grinds to the filter and the coffee pot under the funnel. Turn the machine on. Once all the water has emptied from the tank and flowed into the pot, turn the machine off, empty the grounds, and enjoy.
Immersion
Immersion is a popular approach to brewing coffee. Grounds are immersed in water, which infuses the coffee flavor into the water. The water is then filtered out to pour into your drinking vessel.
French Press
Generally, the grind size is larger for the French press and can be a bit more bitter than other recipe approaches from the metal filter. A course grind is ideal for a French press approach. This is necessary to prevent over-extraction, but smaller grinds can also pass through the metal filter, giving a gritty taste. A 1:15 ratio works well with the French press. As the French press is available in multiple volumes, you must adjust the specific amount of water and coffee in your vessel. For example, if you have a typical 8-cup (1 liter) model like the Bodum Chambord, you can use about 900ml of water and 60 grams of coffee. That would result in a nearly full vessel.
Put the course grounds into the carafe, then pour the water in. Using a spoon, stir the grounds to make sure all are wet. Cover it with a small plate or the plunger top to keep the heat from escaping, and let it steep for 1 minute. Stir again, clear any crust that may form at the top. Cover with the plunger again and let it sit for three additional minutes (4 minutes total brew time). Gently push the plunger down until it can’t go anymore, and the grounds form a small puck under it. Pour into cups and serve immediately to avoid further extraction.
Hario Switch
I heat water to 96C, ensure the switch is closed on the Hario, and add a V60 filter. I place the Hario Switch on top of the serving cup. I then add water to pre-wet the filter and warm the funnel. I let it sit for one minute. While it sits, I refill my kettle and heat it to 96C. I use a medium-fine grind for the Hario Switch and grind 17 grams of coffee. After a minute, I drain the water by flipping the switch. I empty the cup and reset the cup. Switch places them on my scale, zeroing out the scale. I ensure the switch is closed and add the ground coffee to the filter. I confirm that 17 grams are added. I make a well in the grinds. I zero out the scale again and set the timer to begin when I pour. I pour 45 grams of water to bloom the coffee and swirl. At 0:45, I ran the rest of the water, trying to wet all the grinds evenly until I reached 272 grams (15:1 ratio). This nearly fills the funnel. I let it steep until the 2:00 mark on the timer and then gently stir it 2X clockwise and 2X counter-clockwise to break the crust. At 2:15, I pressed the switch to begin the flow of coffee. At 4:00, I closed the switch as all coffee should have been filtered by then, and it was ready to serve.
Aeropress
The Aeropress is a hybrid of immersion with some pressure. While there are many recipes, this is what I use at home. I use the Aeropress Flow Control Cap, which prevents coffee from dripping into the cup early. If not using the cap, I like the inverted approach, but it can be tricky for beginners, so I’ll outline the standard approach below.
My recipe is the same for either dark or medium roast beans. The only difference is the water temperature. I heat water to 92C for a medium roast, and for the dark roast, I use 85C. I use a medium-fine grind setting and 18 grams of beans for the Original Aeropress. I added the filter to the bottom of the Aeropress basket and attached it to the main body of the Aeropress. I place this combo on the serving cup and put both on a scale. I add the 18 grams of coffee to the bottom of the Aeropress, confirming the weight. I now zero out the scale and prep the timer. I fill the water to the four mark & let it sit for 2:00. I then swirl the Aeropress to break any formed crust. I add the plunger at the top and let it sit for 30 seconds more. I slowly begin compressing the plunger until I hear the characteristic air sound at the end. Remove the Aeropress from the cup and serve.
Oxo Compact Cold Brew Coffee Maker
Cold brew made easy. I use a rough grind setting of 30 on my Baratza grinder for cold brew. I add 170 grams of coffee to the grinder, which feels like a lot. You may need to grind it in a few batches, depending on the capacity of your grinder. After assembling the Oxo vessel with the quick-release holder on the bottom and the filter sandwiched between the upper vessel and drain, you can add the ground coffee. Put in the rain skirt and add 700 grams of water spread around the rainmaker top. Let it sit for 12 hours if left at room temperature or 24 if put in the refrigerator. I find it easiest to leave it on the counter near my coffee gear overnight, so I’ll brew it in the evening so it’s ready when I wake up.
After the brew time, place the included glass carafe on your counter with the cap removed and put the vessel with the brewed coffee on top. This will trigger the release valve, and the coffee will begin draining into the carafe. With so many grinds, it can take a while, so I usually let it sit for around 5 minutes or until the drips have become infrequent. I can now put the small carafe in the fridge to chill or make my first coffee immediately.
The coffee in the carafe is concentrated, so you’ll want to add water to get it to the right strength. If I want it cold, I usually grab a tall glass, put it on my scale, and zero it out. I pour in 60 grams of the concentrate. I then add two ice cubes and cold water until the total weight in the glass is 180 grams. This 1:2 ratio of concentrate to water gives good results. The ice cubes are included in the water weight, so as they melt, they keep you in that range.
Pressure
We can’t discuss brewing methods without considering pressure approaches. One advantage of going to a coffee shop is most have an espresso machine. This machine extracts high-pressure coffee (typically 9 bar or about 130PSI). A home espresso machine will be expensive, and each will have instructions relevant to the specific model. There are some lower-cost, pressure-based brewers you can use at home that we outline here.
Aeropress
The Aeropress does bridge the gap between immersion and pressure, so follow the directions in the immersion section.
MokaPot
The MokaPot is from the famed Italian maker Bialeti. This is a staple in Italian homes and is easy for stovetop coffee making. While this does have a boiler and pressure vessel, this is less than 3 bars of pressure (~45PSI), so it is not quite an espresso but more than an Aeropress. Mine is a 2-cup version, so adjust the volumes to suit your capacity. I typically use a dark roast, but a good quality medium or light roast can be flavorful. I fill the boiler to the safety valve. Using the basket as a measuring cup works to get the right amount, ensuring no beans are above the top. This is typically about 17 grams. I use a medium-fine grind and add the ground coffee to the basket. I do some light tamping to ensure none of the grinds extend above the top of the basket and ensure none will get in the threads. I screw the top on and place it on medium heat. After a few minutes, coffee will escape through the tube in the center of the moka pot. There will be a marked change in sound once most of the water has come through & it becomes mostly air. I turn off the heat at this point and serve.
Picopresso
The Picopresso is a manual machine from Wacaco that can also be used camping. You manually pump it to create the 9 bars, and the water is forced through the puck and shower head into your cup below. One cool feature of the Picopresso is it contains the tools right inside it, like a tamper and a distribution tool.
I begin with pre-warming the unit and preparing for the brew. I boil water and fill the vessel with boiling water to prewarm the container. I screw the cover on and then let it sit for 1 minute. I typically grind the beans while waiting here, using 20 grams of coffee. Then, pump the water through the basket until you get a steady stream. You can now unscrew the top cover and empty the rest of the water. I often refill my kettle and boil it while preparing the next step.
Now add the dosing ring to the basket and add the ground coffee to the basket. Using the WDT tool, break up the grinds to avoid clumping before tamping. Now, use the tamper to push down against the dosing ring, which will help ensure the right amount of pressure. Fill the water chamber with boiling water almost to the top, or if you have a scale, 70 grams worth. Screw the cap on and hold the unit over your serving cup. Begin pumping, and you should see some liquid come out after 8-12 pumps. I pause here to allow the preinfusion of the basket for 10 seconds. I now pump at roughly one pump per second, which should yield a steady stream of espresso. It should extract about 40 grams into your cup, giving you a 2:1 ratio.
Coffee Tools
Regardless of your brewing approach, some tools are universal across the recipes.
Grinder
A good quality grinder is a must-have if you want the best-tasting coffee. Burr grinders will give a more consistent grind size than a blade grinder, so they are often a good option. Both manual and automatic grinders are available. Manual grinders are commonly used when camping for size and practical reasons, but they can add to the experience even at home. Most grinders will include adjustments that allow you to control the size of the grinds created. Something that ranges from espresso to course ground will be most versatile. Price does scale with quality, and while you can get some cheap grinders for <$100, they may not last. Baratza is a well-respected brand with excellent quality grinders starting around ~$200. Amazon | Coffee Bros | I use one of these, which has been going strong for almost a decade. Ones with built-in scales and digital grind settings will be more expensive so that you could spend over $1000. If you are getting started and can swing it, I’d strongly recommend one of the Baratza models as a high-quality but not insanely-priced option.
Scale
As you continue to improve your technique, the brew ratio becomes critical to getting the best cup of coffee possible. Measuring the amount of coffee and the amount of water with a scale enables the most repeatable recipes. While a cheap digital scale available from Amazon is a great way to start, some coffee-specific ones like this one I use from Timemore also include timers that can activate when you begin your pour for even more precision.
Kettle
For pour-over, a good quality gooseneck kettle perfectly complements your brewer. All electric options, like the Stagg EKG (~$165) - | Coffee Bros | Amazon |, enable precise temperature settings you can adjust for your recipes. One from Timemore (I own this) running about $100 is cheaper than the Stagg. More affordable options can be good for starting if you don’t care about precise temperatures.